Building a Paint Shader with Voronoi Noise
The Effect
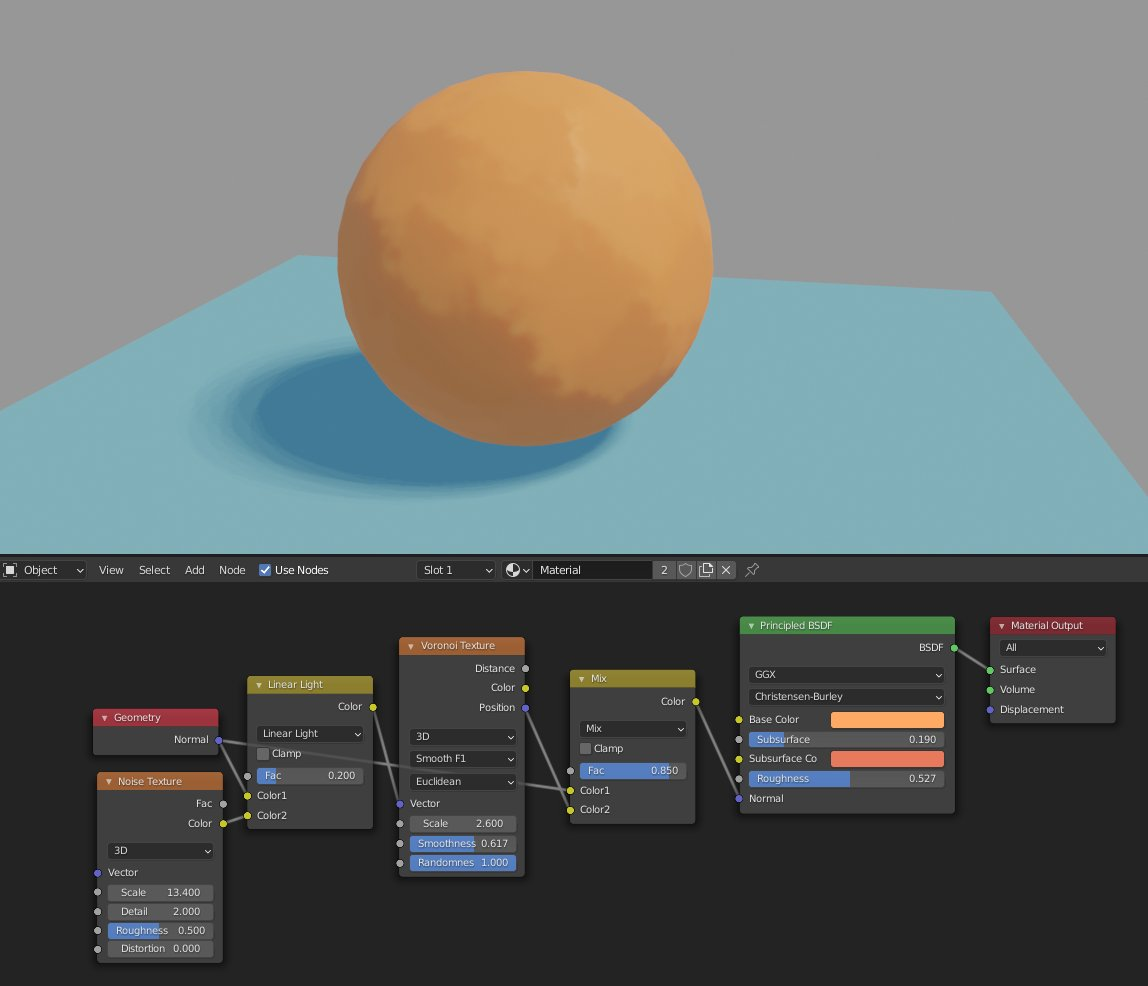
Recently my friend showed me a blender shader he found on the internet, and we decided to port it into unity. Here is what the final result look like in Unity:
There is no smooth lighting transition over the sphere. Instead, the colors appear in discrete patches, with soft transition between each patch. This produces an oil-painting-like effect.
Shader Breakdown
Overview
The magic done in the original shader lies within how it warps the surface normals. It divides the 3D space into small voronoi cells. When it is lighting a point, instead of using its origin normal, we first find out which voronoi cell its normal vector falls in. Then, we use the “center” of the voronoi cell as the normal instead. This has the effect of grouping points with similar normals together into patches.
Here’s a 2D illustration of how it works:
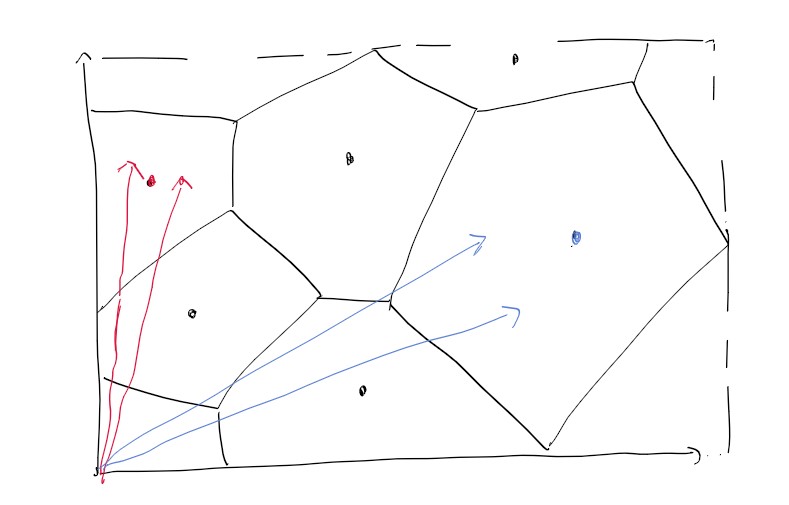
In the above diagram, the two red normals would all be grouped together and lit with the vector pointing to the red point, since they fall within the same voronoi cell. The same happens with the blue ones.
This diagram is in 2D so its simply to see what’s going on, but
I had to dealt with several problems while implementing the shader in Unity:
First, even though the diagram I have shown is 2D, the voronoi cells themselves used in the shader are in 3D (since normal vectors are 3D). Unity doesn’t have a built-in 3D voronoi noise node for shader-graph, so I had to built my own in HLSL.
Second, if I just used the plain Voronoi diagram, with clear-cut edges between cells, the patches on the geometry looks too sharp (see image below). This is not the effect I wanted. I want the normals of neighboring cells to “blend” together near the edges. Luckily I found a variant of a voronoi noise that does exactly I want.
Generating 3D voronoi noises
To generate voronoi noise, the program needs to first select the “center” points of the voronoi cells. A convenient way to achieve this in a shader is to divide the space with a regular grid, then offset the origin of each cell by a random amount. These offsetted points are then used as centers of voronoi cells.
When we want to determine which voronoi cell a point belongs to, we first find the regular grid cell it is in, then look at all centers around it. Each exactly one center point is generated by each regular grid cell, we only need to look regular cells near-by.
Here is my code that generates 3D voronoi noise:
// The hash function generates a random offset for a given input
float3 voronoi_hash(float3 p)
{
    p = float3(
        dot(p, float3(127.1, 311.7, 241.3)),
        dot(p, float3(269.5, 183.3, 137.9)),
        dot(p, float3(209.1, 172.5, 98.7)));

    return frac(sin(p * 29.3) * 43758.5453);
}

void Voronoi3dNormal_float(float3 world_normal, float resolution, float smooth, out float3 output_normal)
{
    smooth = max(smooth, 0.001);
    resolution = max(resolution, 0.001);

    float3 scaled = world_normal * resolution;

    // n is the regular cell the current point belongs to
    float3 n = floor(scaled);
    float3 f = frac(scaled);

    float md = 8.0;
    float3 mn = 0;

    // Look at the neighboring regular cells, up to a distance of 2
    for (int k = -2; k <= 2; ++k)
    {
        for (int j = -2; j <= 2; ++j)
        {
            for (int i = -2; i <= 2; ++i)
            {
                // This is a direct adaptation from Inigo Quilez's code on ShaderToys
                float3 g = float3(float(i), float(j), float(k));
                float3 o = voronoi_hash(n + g);
                float d = length(g - f + o);
                float3 nor = n + g + o;

                // Notice that we don't use the min function here, but instead
                // lerp between the values if the distances to the two centers
                // are close
                float h = smoothstep(-1.0, 1.0, (md - d) / smooth);
                float burn = h * (1.0 - h) * smooth / (1.0 + 3.0 * smooth);
                md = lerp(md, d, h) - burn;
                mn = lerp(mn, nor, h) - burn;
            }
        }

        output_normal = normalize(mn);
    }
}
Notice the use of smoothstep in the code above:
float h = smoothstep(-1.0, 1.0, (md - d) / smooth);
h becomes 1 if md is a lot greater than d, 0 if md is a lot less than d, but a value
between 0 and 1 if they are close enough. We can then use h as a blend factor to blend between the normal
of the closest cell and the normal of the current cell.
Using the noise in Shader Graph
I first created a custom function node for the Voronoi3dNormal_float function above:
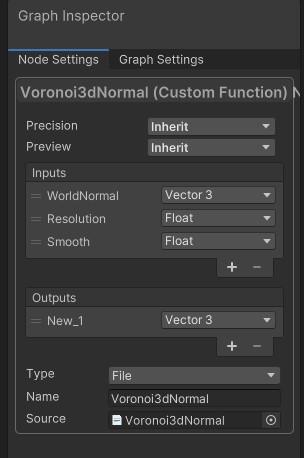
The Resolution parameter controls the size of each patch, and the Smooth function controls how smooth the edges between those patches should be:
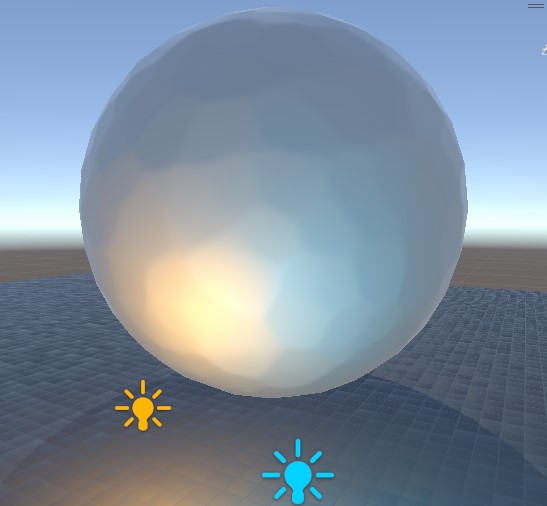
Resolution = 5, Smooth = 0.25
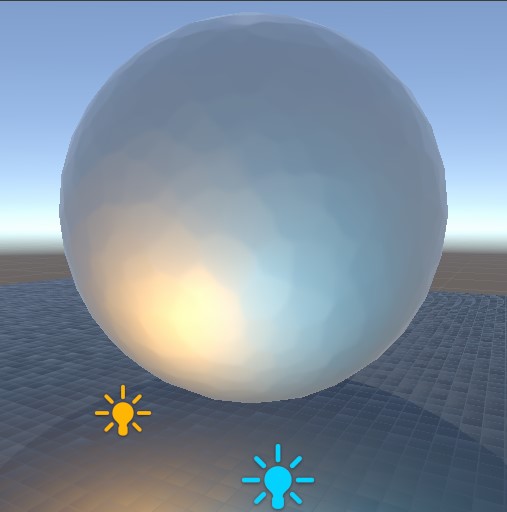
Resolution = 8.5, Smooth = 0.25
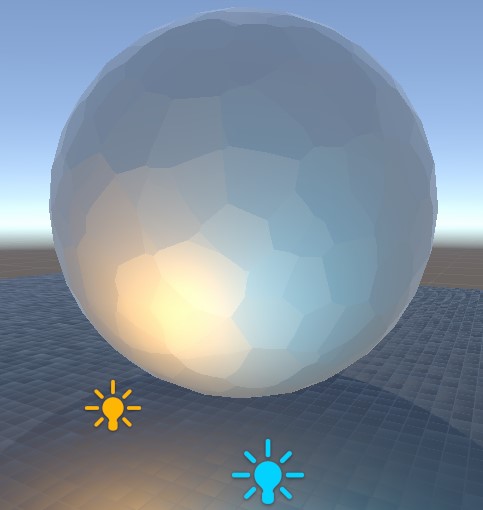
Resolution = 5, Smooth = 0
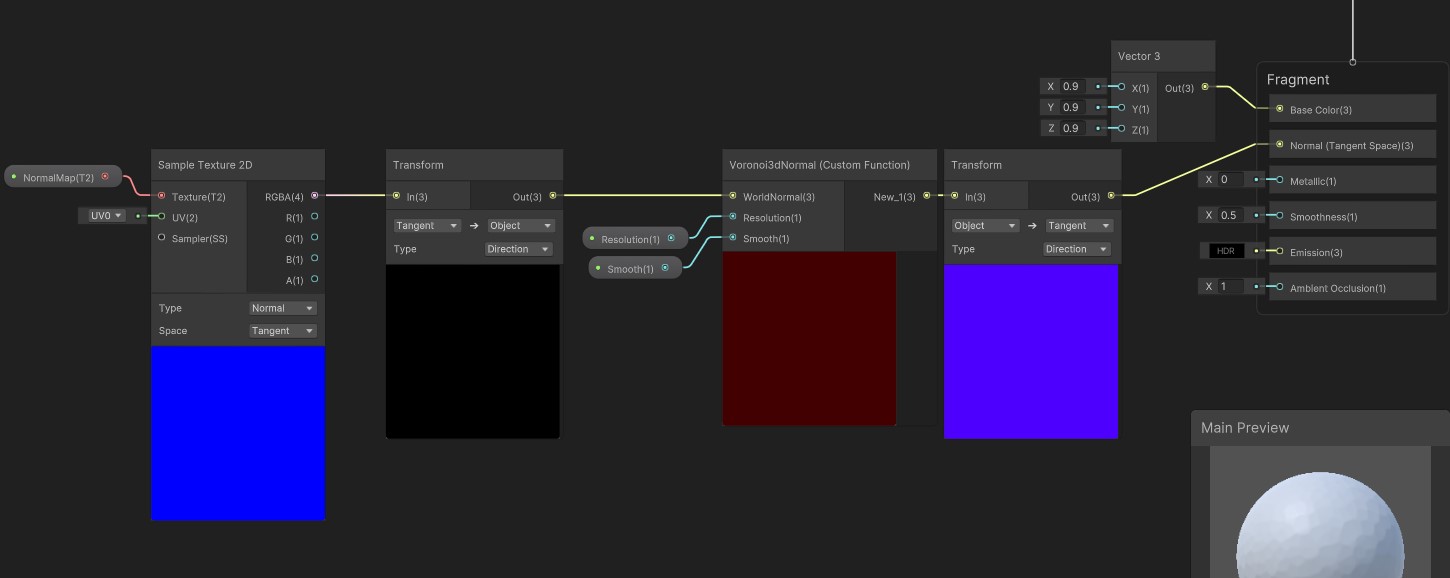
The whole shader graph looks like the following:
One limitation of this Shader is that it only really works well with objects without sharp normal changes, like a sphere or the face of a character.